Trick or Treat Machine Design – A Real Project Review
I’ve been stitching out machine embroidery designs for over a decade, and I’ve learned that a design that looks good on screen doesn’t always behave well on fabric. When I first opened the Trick or Treat Machine Design, I was curious how it would translate from a digital embroidery file to a finished handmade product. I decided to test it on a custom tote bag for a local Halloween craft fair, and I want to share what I found before you use this design in your own work.
First Look: Mood, Shape, and Visual Personality
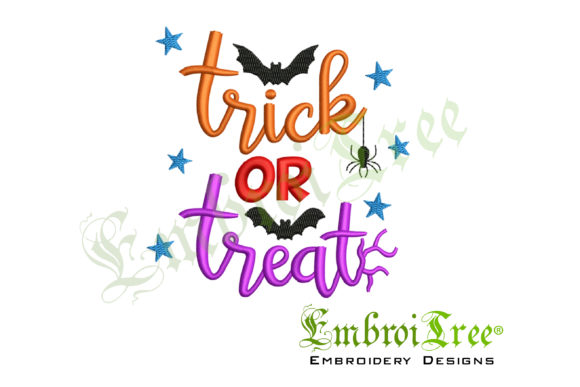
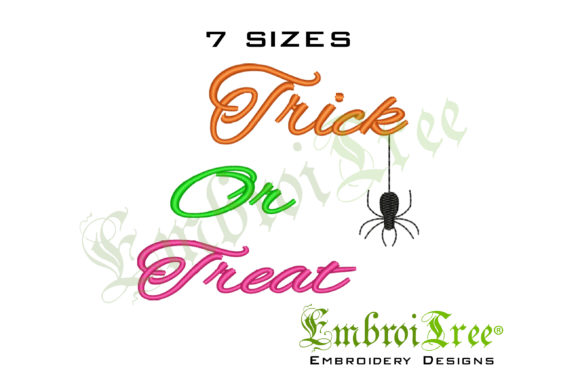
The Trick or Treat Machine Design has a playful, slightly nostalgic feel. The lettering is bold and readable, with a friendly curve that suits the Halloween theme without being overly spooky. The layout is balanced, with enough negative space to keep the design from feeling crowded. The overall shape works well as a standalone embroidery project or as part of a larger arrangement on a sweatshirt, apron, or pillow cover. The mood is approachable and festive, which makes it a strong candidate for both personal gifts and small shop merchandise.
What caught my attention was the detail level. The design uses a mix of satin stitch for the main lettering and fill stitch for the decorative elements. The thread colors in the included color chart are well chosen, but I recommend testing them against your actual fabric before committing. The design comes in seven sizes, which gives you flexibility for different hoop sizes and product types. Just keep in mind that resizing or editing is not recommended, so choose your size carefully before you start.
Real-Life Performance on Custom Apparel and Accessories
I stitched the Trick or Treat Machine Design onto a medium-weight cotton tote bag. The fabric was stable enough to hold the stitch density without puckering, and the design ran cleanly through my machine. The satin stitch edges were crisp, and the fill stitch areas covered well without gaps. For a craft business owner or Etsy seller, this kind of reliability is critical. Customers expect a finished product that looks professional, and this design delivers that level of polish.
Since the design is available in multiple sizes, I could see it working on a range of products. A smaller size would fit nicely on a baby onesie or a children’s Halloween outfit. A medium size works well on a sweatshirt or a tote bag design. The largest size could be used as a standalone piece on a pillow cover or a kitchen towel. For handmade shop owners, this versatility is a real advantage. You can offer the same design across different product categories without needing to edit the embroidery file.
I also tested it on a cotton-polyester blend sweatshirt. The fabric had a bit more stretch, so I used a cutaway stabilizer and a lightweight topping. The design handled the fabric movement well, and the stitch density was not too heavy for the garment. If you are planning to use this design on custom apparel, I recommend testing on a scrap of the same fabric first. The design performs consistently, but every fabric reacts differently to machine embroidery.
Where to Use Carefully: Fabric and Hoop Considerations
No design is perfect for every situation, and the Trick or Treat Machine Design has a few areas where you need to be deliberate. The design contains some detailed corners and moderately dense stitch areas. On very thin or lightweight fabrics, those dense sections could cause distortion. I would avoid using this design on sheer blouses, delicate silk, or loosely woven linen without a strong stabilizer backing.
If you are stitching on dark fabric, pay attention to thread color contrast. The color chart is included, but you should verify that your chosen thread colors stand out against the fabric. For a black tote bag or a dark navy sweatshirt, consider using a bright or metallic thread to make the design pop. The same applies to textured fabrics like fleece or terry cloth. The design will stitch out, but the detail may get lost in the fabric texture. Test first, then commit.
For curved surfaces like caps or beanies, the design’s size matters. The smaller sizes in the set are more likely to fit comfortably on a cap front. The larger sizes may extend beyond the usable stitching area, especially on structured hats. If you are making embroidered patches, the design stitches out cleanly and can be cut close to the edge. I tested a patch version on twill fabric with a tearaway stabilizer, and the edges held well without fraying.
Frequent washing is another factor. If you are creating products that will be washed often, such as tea towels, baby blankets, or kitchen aprons, the design’s stitch density is moderate enough to hold up over time. Use a quality stabilizer and avoid excessive tension to keep the stitches from distorting after multiple washes.
How This Design Affects Product Value and Customer Trust
For a small business owner or Etsy seller, the visual appeal of a finished product is everything. The Trick or Treat Machine Design has a clean, recognizable look that customers immediately associate with Halloween. When I showed the finished tote bag to a few friends, they commented on how professional the stitching looked. That kind of reaction builds trust. If you are selling handmade products, a design that stitches out cleanly and looks polished on the first try saves you time, materials, and frustration.
The design also works well for boutique branding and personalized gifts. A parent buying a custom Halloween sweatshirt for their child wants something that looks like it came from a specialty shop, not a home machine. This design delivers that level of quality. For holiday embroidery, it strikes the right balance between festive and tasteful. It is not too cartoonish, but it is clearly Halloween-themed. That makes it a safer choice for customers who want something cute without being overly kitschy.
If you sell digital products, such as printable mockups or design assets, this design is easy to photograph and display. The stitch details show up well in photos, which helps your listings look professional. I used the finished tote bag as a prop in a mockup for my own shop, and the design photographed beautifully without needing heavy editing.
Practical Designer Notes Before You Stitch
Before you load the Trick or Treat Machine Design onto your machine, here are a few things I recommend checking. First, test the design on scrap fabric that matches your final project material. This is the single most important step. You need to see how the design behaves with your specific thread, fabric, and stabilizer combination. Second, review the stitch density. If the design feels too dense for your fabric, you may need to adjust your stabilizer choice or use a lighter weight thread.
Third, check the thread color contrast against your fabric. The color chart is included, but it is your responsibility to confirm that the colors work together. I always make a black and white mockup of the design to see the value contrast. If the design disappears into the fabric in grayscale, it will likely be hard to read in color. Fourth, confirm your hoop size. The design comes in seven sizes, so pick the one that fits your hoop comfortably. Do not try to stretch the design into a hoop that is too small.
Fifth, inspect the small details. The design has some fine lines and decorative elements that could be affected by fabric stretch or thread tension. If you are using a stretchy fabric, add a stabilizer and a topping to keep those details sharp. Finally, check the licensing before you use the design for commercial projects. The design is a digital embroidery file, and you need to confirm whether you are allowed to sell finished items made from it. If you plan to sell digital products or design assets, verify that your license covers that use.
Final Thoughts on Real-World Use
The Trick or Treat Machine Design is a solid choice for a wide range of embroidery projects. It works well on custom apparel, tote bags, patches, pillow covers, and holiday gifts. It performs reliably on medium-weight fabrics and handles stretchy materials with the right stabilizer. The design is visually appealing, easy to photograph, and suitable for both personal and commercial use. As with any machine embroidery design, test first, stitch carefully, and pay attention to fabric and thread choices. If you do that, this design will serve you well for Halloween projects and beyond.